

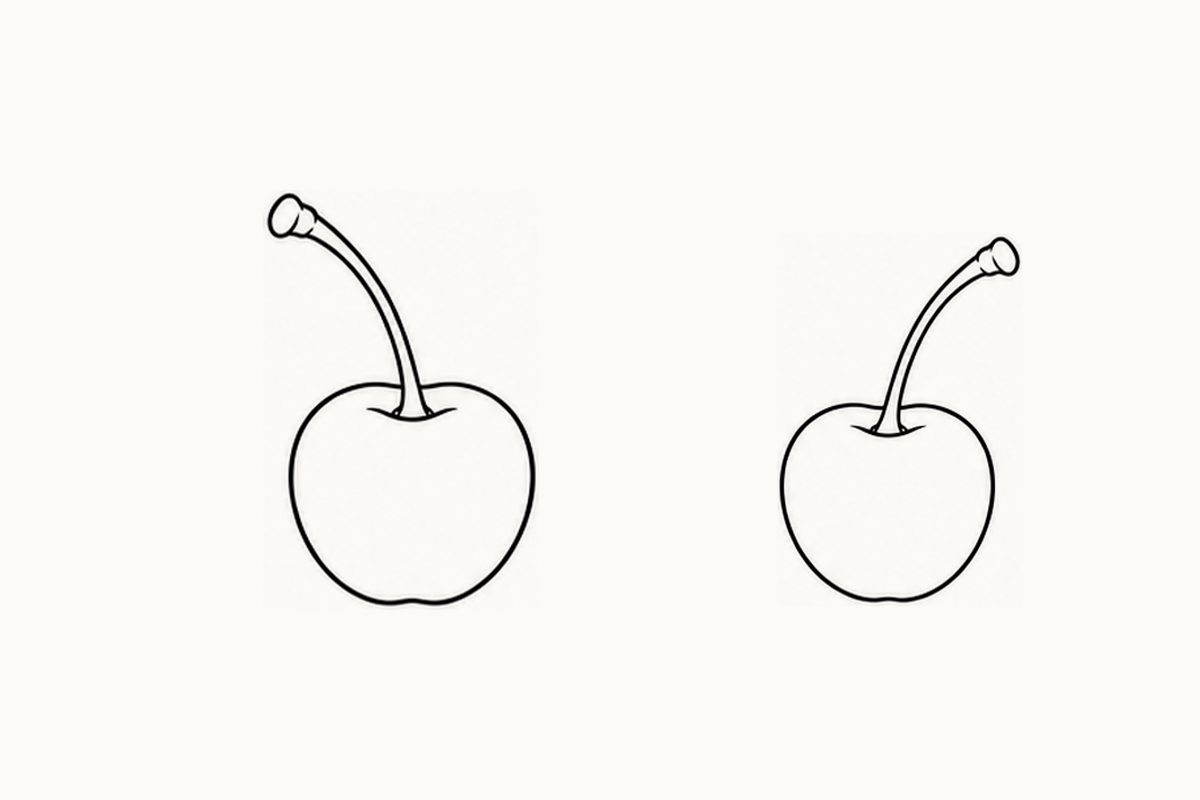
These beginner cherry coloring pages offer five A4 sheets of single whole fruits with curved stems, plus empty bands for drawing. Choose one sheet, a pencil and a few crayons. At the top left of page 1, follow the long stem down to its shallow dip in the fruit and ask, “Where does this stem join the cherry?” Your child can point, color the broad fruit shape or draw a larger cherry below it. One fruit and one connected stem are enough for this turn.
Download the five-page Beginner Cherry PDF (1.59 MB)
What is in the Beginner set?
Each page contains eight small single-cherry references in two rows, with two blank practice bands. The five sheets recombine sixteen selected source reference positions; forty printed positions are not forty unique drawings. The fruits are round or slightly heart-shaped, with shallow stem recesses and slender attached stalks. Some stems rise above the fruit, while tilted views send them toward a side. All the fruits are intact. This set does not show open halves, exposed stones, joined clusters, faces or extra objects.
Make room for the stem
Choose the first reference on page 1 and point to the empty space around its long stalk. Before drawing, let your child decide where the rounded fruit will sit in a blank band. Leave some space above it for the stalk, or turn the paper so there is room to one side. You can say, “Shall this stem bend left or right?” Their drawing can choose either direction. The reference helps them connect the parts; it does not require an exact copy of the stalk's length or curve.
Look through the complete sheets
Page 1 puts stems bending left and right across the upper row. The lower-left view makes the recess around a stem especially clear. Another lower view shows a small mark on the outside of the fruit. That mark is not an exposed stone inside a cut cherry.
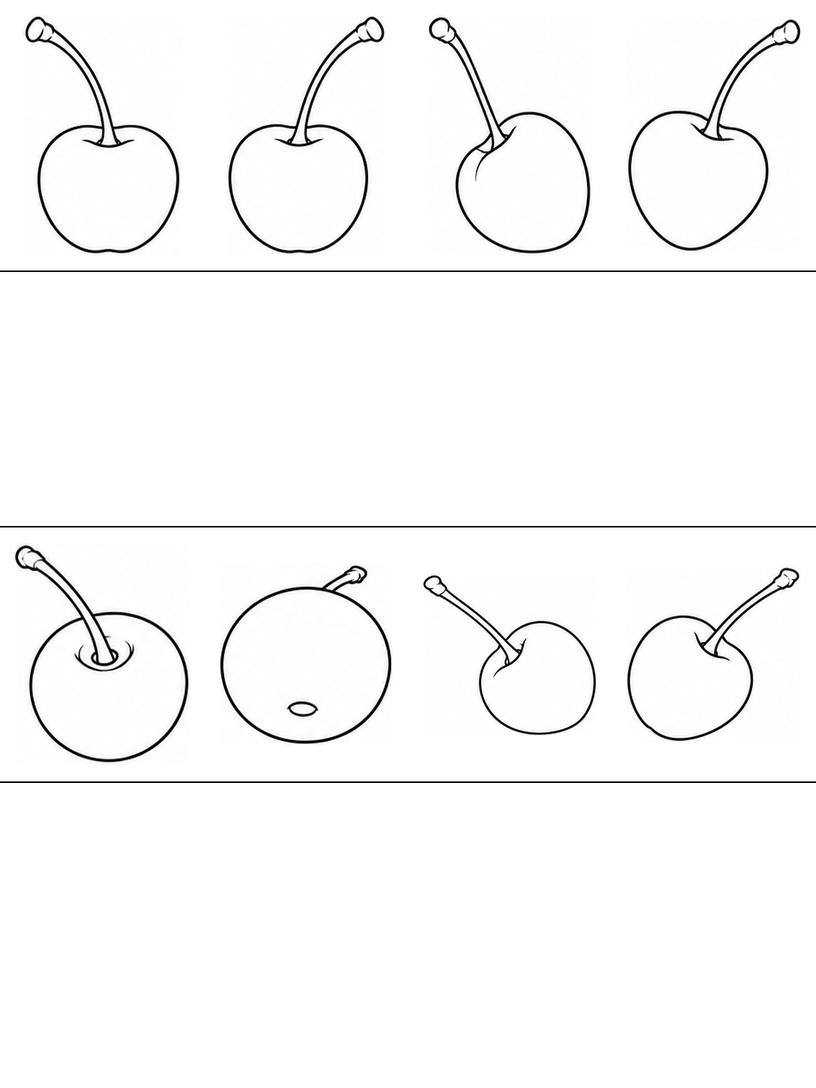
Page 2 includes two views at the lower right whose stems stretch sideways toward opposite edges. Follow a stalk back to its own fruit before beginning a drawing. You can rotate the sheet or choose an upright view if a sideways connection is harder to follow.
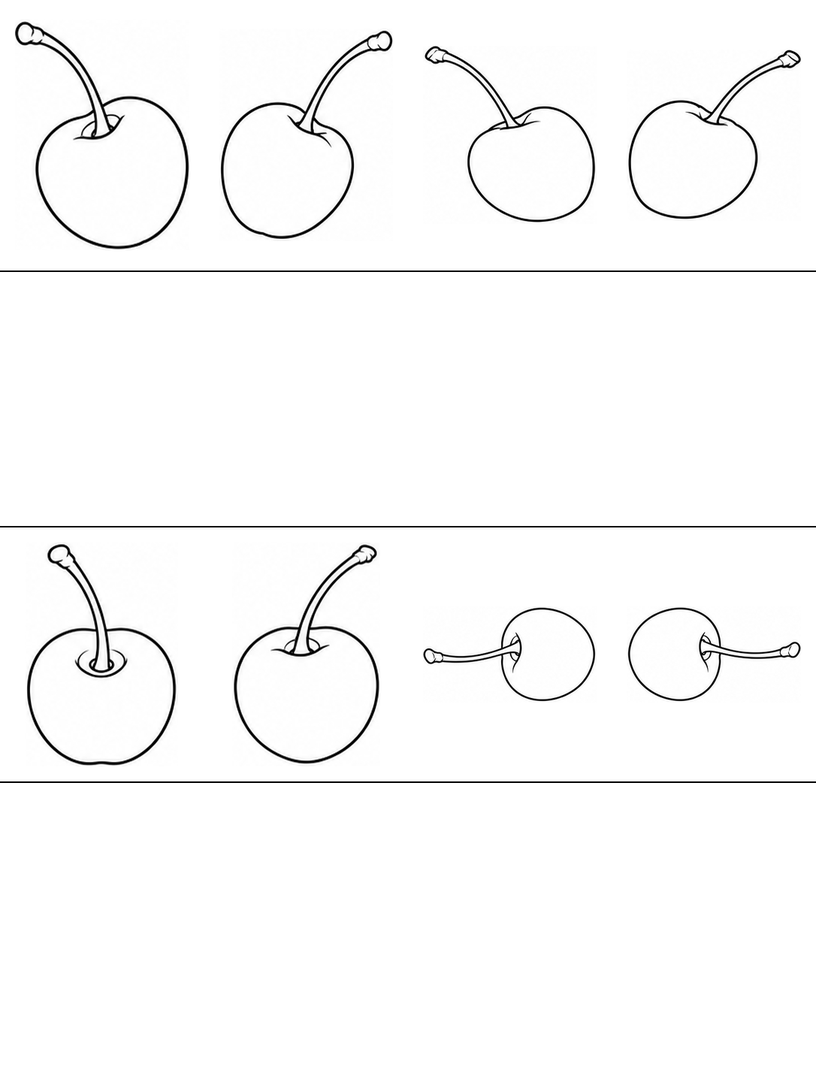
Page 3 combines familiar upright and tilted fruits, including a side-facing stalk at the lower right. Compare a cherry with a broad upper curve to one that leans. The broad fruit can stay simple while your child tries a different stem direction.
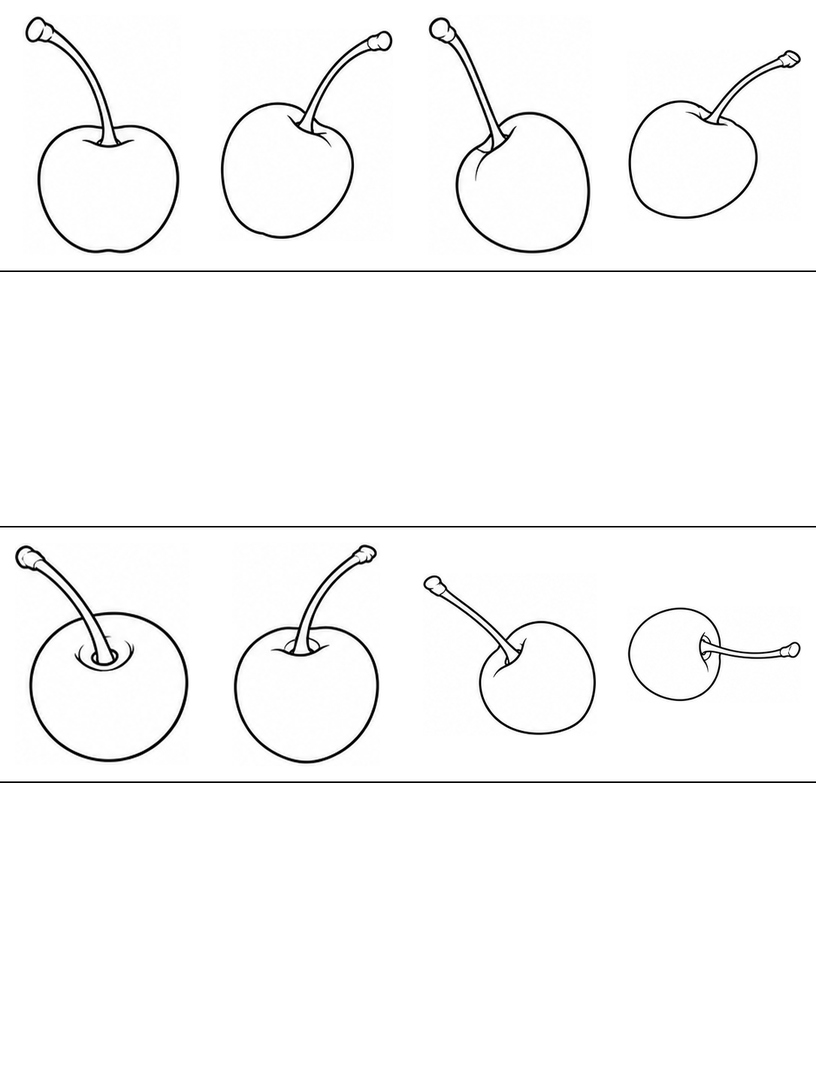
Page 4 includes a clear recess view in the lower row, a small outside-end mark on another fruit and a sideways stalk. Some stems begin nearer the visible side of the fruit rather than looking centered. Follow the chosen view instead of putting the same little dip in every outline.
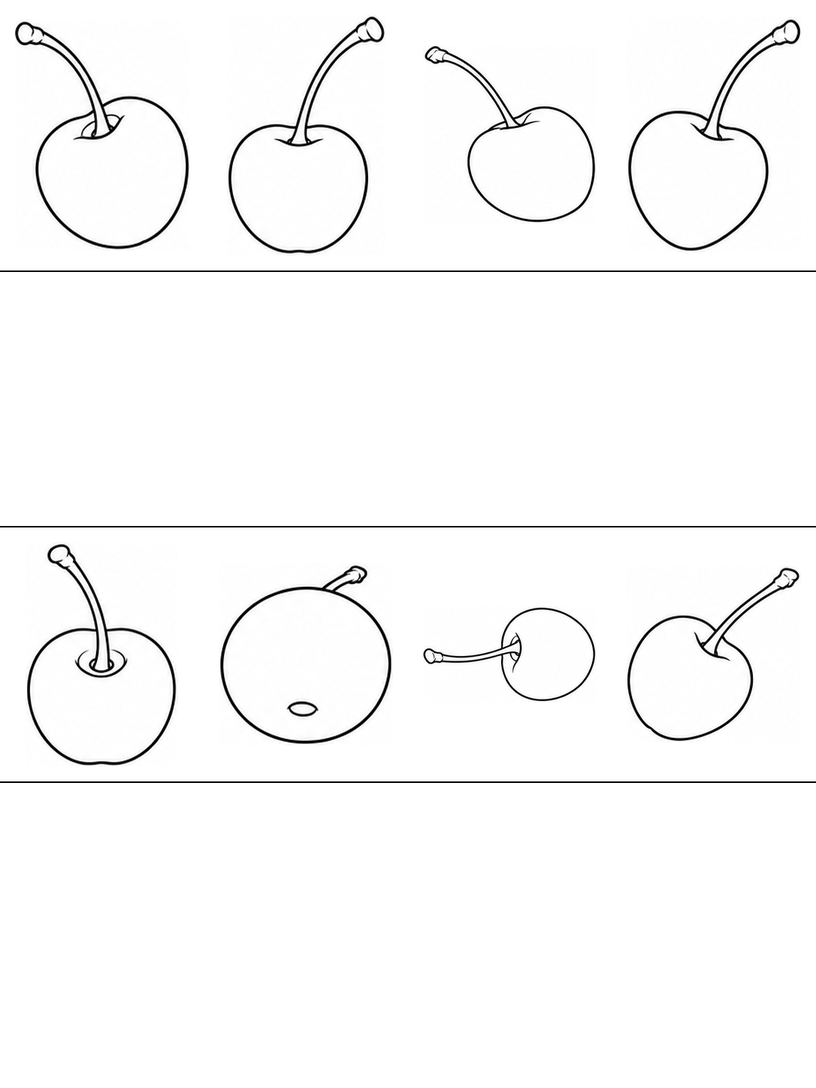
Page 5 rearranges upright and tilted references again. Choose a known stem curve for another color or draw it larger in a blank band. Repeated views are part of the set, so there is no need to treat this page as eight completely new fruit designs.
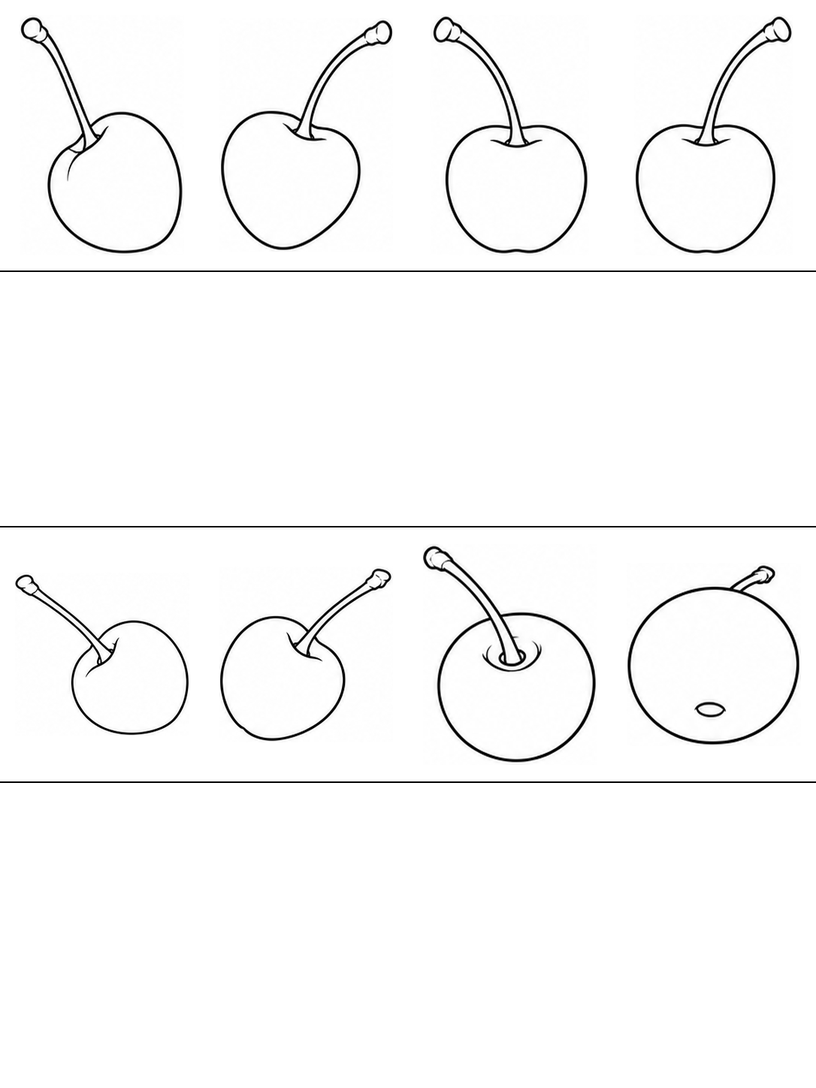
Draw one cherry with an attached curved stem
Use an upright reference from the top row of page 1. Draw in a blank band or on spare paper and leave room above the fruit. A larger drawing can make the shallow dip and the two edges of the stalk easier to join.
- Shape the rounded body. Begin with two broad upper shoulders and curve down around the fruit. Bring the sides together with a rounded lower edge. Leave a small shallow dip between the shoulders; avoid stretching the lower curve into a sharp decorative heart point.
- Start the stem inside the dip. From that shallow recess, draw a light curve upward in the direction you choose. Let it bend gently rather than adding a sharp corner. Keep its lower end touching the fruit so it does not become a separate line floating above the outline.
- Give the stalk a second edge. Draw a nearby curve back down toward the same recess and join the small upper end. Add one short curve beside the base if it helps show where the stalk enters. Leave the broad fruit interior open, then choose a color or keep the drawing as an outline.
If the stem floats, extend its lower edges into the shallow dip. If the fruit looks like a pointed heart, make the next lower curve fuller and rounder. If there is no room for the stalk, start the next fruit lower on spare paper or let the stem lean sideways. Choose one adjustment for another attempt, rather than tracing over every line. Your child can also color the printed fruit and leave the stem uncolored.
A made-up fruit-display choice
For an optional made-up story, imagine that a fruit display needs one cherry whose stem bends left and another whose stem bends right. Ask your child to find their chosen direction on the sheet and draw just one of those cherries in a practice band. They may draw a second only if they want to compare the curves. The display is your imagined setting, not a scene or game included in the PDF.
Choose a smaller next step
A child who wants less drawing can point to the stalk attachment and color one broad fruit instead. Red is one choice, but they can choose another color, leave a white area or stop with the outline. For another whole-fruit comparison later, the Beginner apple sheets offer round shapes with shorter stems. The Beginner bird sheets provide a change of subject. These are options for another turn, not a list to finish.
Printing and file notes
The PDF contains only the five Beginner cherry sheets. Choose A4 paper and 100% / Actual size, inspect the preview for clipped borders and try one page first. Use Fit if your printer needs extra margin. The printing guide explains these settings. The files have been checked digitally, but no physical print test has been performed.
Worksheet questions
Does the small oval mark show a cherry stone?
No. These Beginner pictures show intact fruit. The small mark on an outside-end view is a surface detail, not an exposed stone inside a half. There are no cut-open references in this set.
Must every stem start in the exact center?
No. Look at the view you choose: the fruit turns and the visible recess shifts within its outline. Begin with a clear upright reference if that is easier, then try a tilted or sideways view another time.
Are there forty different cherry drawings?
No. Eight reference positions appear on each page, using combinations of sixteen selected source positions. Familiar single-cherry views recur across the five sheets. Choose a view for its outline or stem direction rather than expecting forty unique designs.
Use and sharing
You may print these pages for personal, family or classroom activities. Keep the website credit on the sheets. Share this article link with other adults instead of redistributing or selling the PDF. Read the terms of use for the permission and its limits.
Creation and editorial note
The activity guide and page layout were prepared and edited for Coloring Pages Story, with AI assistance. The line art is AI-assisted. The page previews and five-page PDF have been checked digitally. No classroom trial or physical print test has been performed.
Comments
Comments are closed